Wednesday, December 19, 2012

Ice Cream Substitute #1: Dairy Free Frozen Coconut Milk


I SCREAM, YOU SCREAM...  anyone who knows me well knows that I love ice cream!  It was hard for me to stop eating my favorite frozen dairy treat when I gave up processed foods.  I started looking around for some ice cream substitutes, and I've come across/made up some pretty delicious recipes.  I'll share them all with you eventually.  The other day, I was reading the amazing Oh She Glows blog, and I found a recipe for coconut milk whipped cream.  After reading it, the gears in my brain started spinning and I thought, "Hmmmmm... I could probably freeze that stuff and make some delicious ice cream!"  Guess what?  I was right.  :)


DAIRY FREE FROZEN COCONUT MILK

Ingredients:

1 can of full-fat coconut milk
1 generous squirt of agave nectar
About 1/2 tsp. pure vanilla

1.  Chill the can of coconut milk in the fridge overnight.

2.  Remove the can from the refrigerator and flip it upside down.  This is important, because it allows you to open the can with the liquidy part of the coconut milk on top.

3.  Pour out the liquid and save it for another recipe.  You could use it in a smoothie, for example.  I attempted to add it to a waffle recipe, thinking that it would add a wonderful coconutty flavor, but it was a flop.  Don't bother trying it, or if you do, don't say I didn't warn you.

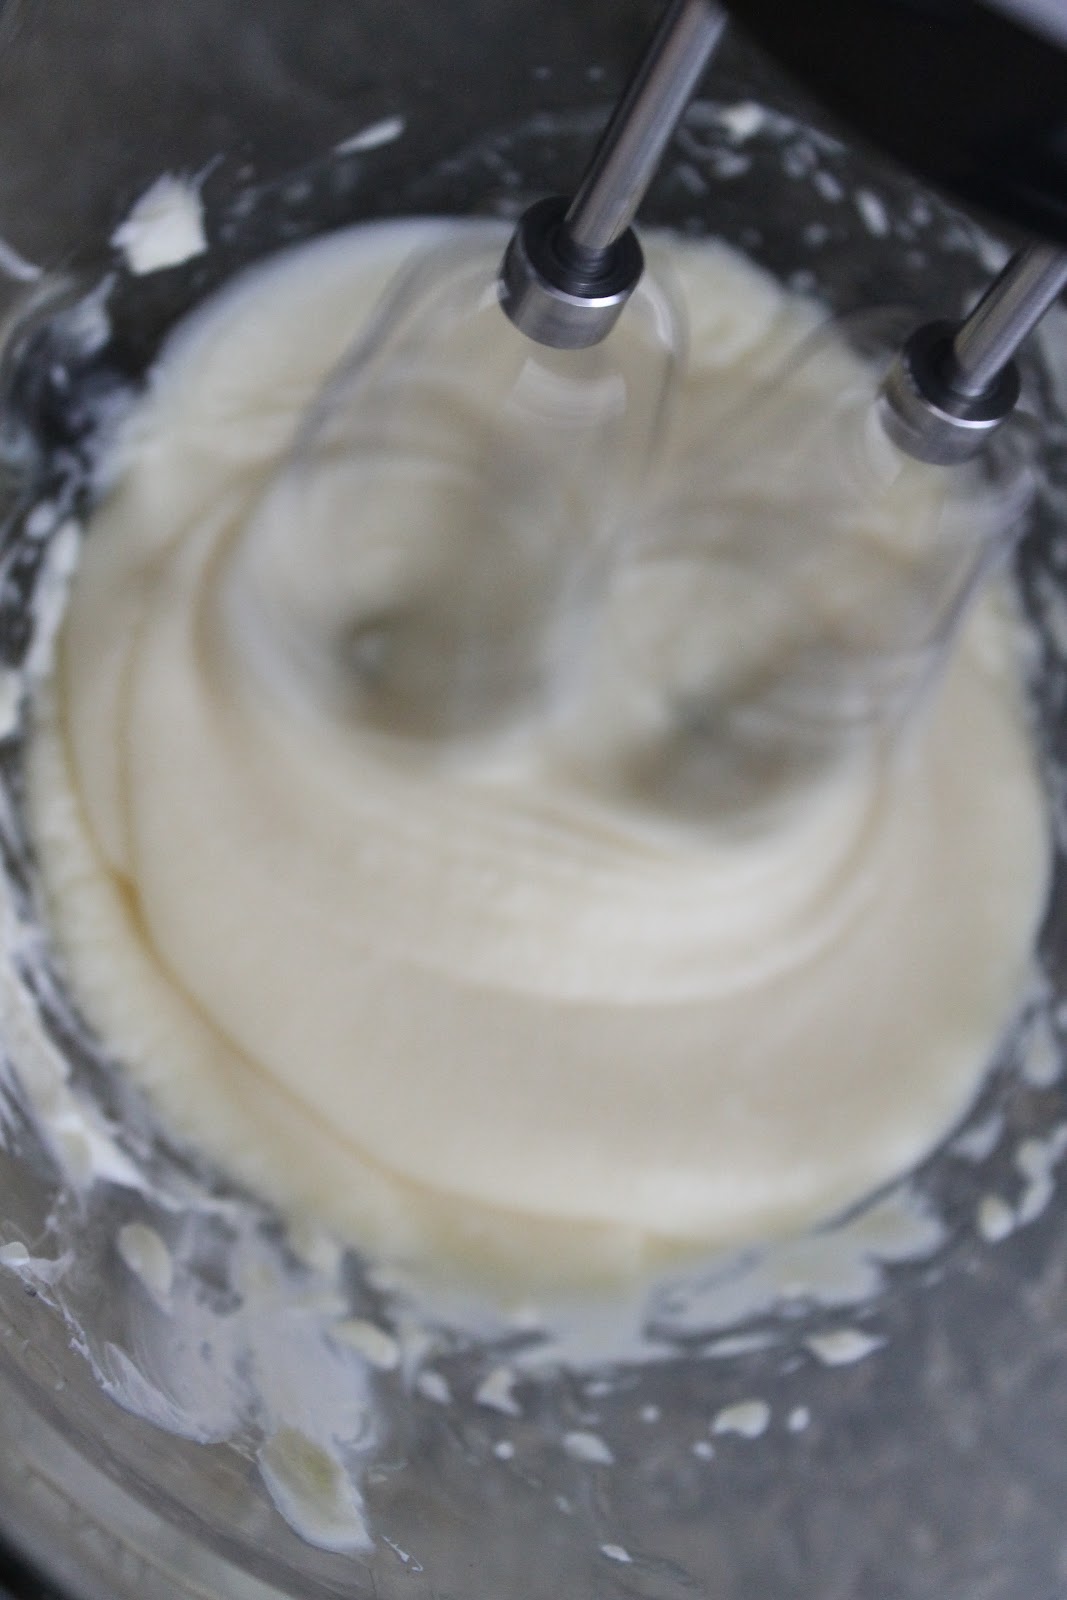
4.  Scoop the hardened part of the coconut milk into a bowl and whip it with an electric mixer. Continue whipping until a whipped cream consistency is reached.

5.  Add agave and vanilla, and continue whipping.  At this point, you have coconut milk whipped cream, which is absolutely divine!

6.  Scoop whipped cream into a bowl and set it in the freezer.  Every 30 minutes, remove and stir.  After about 2 hours, you will have a wonderful "ice cream!"

7.  Serve alone in a bowl, or topped with homemade natural chocolate syrup (I subbed sucanat for the cane sugar), or as a topping on some warmed up chocolate banana bread!  YUM!!!

Refrigerate coconut milk overnight.  Flip can upside down.
Open can.  You'll see the liquid part of the coconut milk on top.  Remove and use in another recipe.
Scoop the more solidified portion of the coconut milk into a bowl.
Whip with an electric mixer (or a hand whisk, if you want to get really tired!)
Continue whipping until the coconut milk has thickened to a whipped-cream-like consistency.
Add agave nectar and vanilla.
Whip until blended.  You now have coconut milk whipped cream!
Scoop into a small bowl and freeze.  
After 30 minutes, remove and stir....
After 30 more minutes, stir again...
...and do the same after another 30 minutes passes.  
Scoop (I used a cookie scoop to do this) and serve atop your favorite dessert.
Here, it's pictured on some chocolate banana bread.


Wednesday, December 12, 2012

Savory Brunch Bites

Brunch is such a lovely meal... a cross between breakfast and lunch that features the best of both worlds.  I've always enjoyed eating brunch with friends, but it can be a bit tricky at times because I absolutely HATE eggs!  I'm fine if the eggy taste is hidden inside a recipe and masked by other flavors, but I can't stand the egg bakes, omelettes, and other egg-heavy dishes usually found at a brunch.  My husband and I recently hosted a brunch for 25 people at our home, and I made it my mission to create a new recipe that could be enjoyed by everyone - especially me. :)  This Savory Brunch Bites recipe does include two eggs, but they're impossible to taste because there are so many other competing flavors. 

P.S.  It took me 3 tries to get this recipe to work the way I wanted, so I'll give you some tips/tricks/warnings along the way as I tell you how to make them.  

SAVORY BRUNCH BITES

Ingredients:
1 3/4 cups rolled oats
1/2 cup flour of your choice ( I used whole wheat pastry flour)
1 tsp. baking powder
1 tsp. cayenne pepper
1/4 tsp. sea salt
1 tsp. thyme
1 tsp. flaxseed (not necessary to the recipe, but it boosts the nutritional value of the bites)
1 1/4 cups cheese of your choice ( I used full-fat mozzarella)
2 large eggs
3/4 cup water
1 medium potato
1 tbsp. coconut oil, melted
2-3 large button mushrooms, diced.
1/2 of a medium red pepper, diced
3 green onions, chopped

1.  Gather ingredients.  Preheat oven to 350 degrees.

2.  Chop and dice vegetables.  Grate cheese and potato until completely shredded.  Place shredded potato in a small bowl and sprinkle with salt.  This will pull some of the extra moisture out of the potato and keep the bites from getting soggy.  This is VERY IMPORTANT.  I didn't do this the first time I made the recipe, and the bites were soggy and damp. Yuck.

2.  Place dry ingredients in a large mixing bowl.  Mix well.

3.  Add shredded cheese; mix well.

4.  Add remaining ingredients; stir until evenly combined.  Note:  before adding the potatoes, squeeze them firmly to remove extra liquid.

5.  IMPORTANT STEP:  Allow the mixture to rest for AT LEAST 15 minutes to allow the oats to soften as they absorb the liquids.  This is so very important... I can't stress it enough.  The second time I attempted this recipe, I didn't allow the oats to soften and the bites were so hard it actually hurt to eat them.  Needless to say, I threw them out.  :)

6.  Spoon mixture into greased mini muffin tins and bake for 25-30 minutes.

YIELD:  32 mini bites.

Some of the cheese sinks to the bottom of each bite, forming a crunchy browned crust.  I thought these bites were a delicious addition to our brunch, and I've been breaking up the few leftovers and adding them to my salad every day since.  YUM! 

Gather ingredients.

Chop and dice vegetables.  Grate cheese and potato until completely shredded.  

Place shredded potato in a small bowl and sprinkle with salt.  This will pull some of the extra moisture out of the potato and keep the bites from getting soggy.  This is VERY IMPORTANT!!

Place dry ingredients in a large mixing bowl.  Mix well.

Add cheese; mix well.

Add remaining ingredients; stir until evenly combined.
Note:  before adding the potatoes, squeeze them firmly to remove extra liquid.

Allow mixture to sit for at least 15 minutes.

Look at all the liquid I removed from just one potato! 

Spoon into greased mini muffin tins.  Bake for 25-30 minutes at 350 degrees.

Enjoy!
Look at that cheesy, crunchy crust!  Yum!


Wednesday, December 5, 2012

Your Food: Magnified!

RADISH, Caren Alpert Fine Art

Sometimes it's fun to take a different look at our food.  Artist Caren Alpert does just that, using an electron microscope to photograph edible items in an up-close-and-personal style.  The radish photo at the left is both mysterious and beautiful; it almost reminds me of a gorgeous patterned cloth.


CELERY LEAF, Caren Alpert Fine Art

It's interesting to compare the photos of whole, all natural foods to highly processed foods.  Alpert used the microscope to look at everything from celery to Oreos, sometimes zeroing in at a cellular level.  Personally, I enjoyed looking at each photo and trying to determine what it might be before sneaking a peek at the title of the piece.  FYI, I was usually wrong.  :)


If you would like to view the entire collection, check it out here.  I'm directing you to the "Artist's Statement" page, and from there you can access the Gallery.  Enjoy!


What do you think THIS is??


Wednesday, November 28, 2012

Oven-Baked Sweet Potato Fries

All my life, I've hated sweet potatoes.  They always seemed so heavy and starchy, and I couldn't understand why they were always served as "dessert" at family gatherings.  The combination of sweet potato, brown sugar, and marshmallows (how do THEY fit in?) just didn't work for me.  The sweet potato really didn't seem sweet enough to work with the other ingredients.  As I started exploring a whole foods diet, though, I kept reading more and more about the health benefits of sweet potatoes: they're high in vitamins B6, C, and D; they have twice the amount of fiber found in other potatoes; they have a low glycemic index; they're a good source of iron...  I kept feeling like I was missing out on good nutrition because I didn't want to eat a marshmallow-brown sugar-butter-yam concoction that didn't even taste good!  Finally, my cousin encouraged me to try a baked sweet potato, and I was hooked.  Once I removed the expectation that the sweet potato was supposed to be "dessert sweet," I could enjoy the natural sweetness and flavors found in the tuber. I still enjoy baked sweet potatoes, but lately I've been experimenting with oven-baked fries.  After a few trial-and-error sessions, here's the end result:

OVEN-BAKED SWEET POTATO FRIES


Ingredients:
1 large sweet potato
Extra virgin olive oil to drizzle
1/2 tsp. corn starch
1/2 tsp. cumin
1/2 tsp. cinnamon
1/8 tsp. chili powder
1/4 tsp. garam masala or curry powder
dash of salt

1. Preheat oven to 450 degrees. Cut the sweet potato into steak fry sized chunks.  I prefer to leave the skin on to maximize nutritional value, but feel free to peel it if you prefer your fries skinless.

2.  Place the fries in a medium sized bowl and drizzle them with extra virgin olive oil.  Toss to coat.

3.  Sprinkle corn starch on fries; toss to coat. (This step isn't essential, but it helps make the fries crispier.)

4.  Add spices (including salt) to bowl; toss to coat.

5. Arrange fries on a greased baking sheet so they are not touching.  Bake on middle oven rack for 10 minutes.  Flip fries, then bake for an additional 10 minutes.  Your fries are technically done at this point, but I like to turn on the broiler and let them toast until brown before eating them. It's your choice!

6.  Enjoy!!

Gather Ingredients

1.  Cut the sweet potato into steak fry chunks.

2.  Place in a medium sized bowl and drizzle with olive oil.  Toss to coat.
3.  Sprinkle with corn starch; toss to coat.

4.  Add spices; toss to coat.


5.  Arrange on greased baking sheet.  Bake at 450 on middle rack for 10 min.  Flip and bake an additional 10 min.  Broil to brown, if desired.

Enjoy!!  I like to dip my fries in ketchup, so I always look for a brand with all-natural ingredients that doesn't contain high fructose corn syrup.  There are quite a few out there that are really good!

Tuesday, November 13, 2012

Chocolate Banana Bread

Overripe bananas bring one thought to mind: BANANA BREAD!  Even though it takes over an hour to bake, I always find it worth it to take the time to mix up a batch and pop it in the oven.  Before I started my whole foods journey, my favorite banana bread recipe was from the Betty Crocker Cookbook, Bridal Edition.  This cookbook was a shower gift when Andy & I got married, and I've made the recipe several times over the past few years.  I recently adapted the recipe to eliminate processed sugar and refined flour, and I was planning to post it to the blog today.  Then, at the last minute, I decided that I wanted to add a little extra flavor to the batter.  I added some 100% cocoa and some dark chocolate chips, and - YUM! - I have a new favorite banana bread recipe!

CHOCOLATE BANANA BREAD

Ingredients:
3/4 cup agave nectar, or other natural sweetener
1/2 cup butter, room temp. (I usually use coconut oil, but this is for the coconut haters out there.) : )
2 eggs
1 1/2 cups overripe banana, mashed (about 3 1/2 large bananas)
1 tsp. vanilla
1 cup milk (any type, dairy or non-dairy)
1 1/2 tsp. apple cider vinegar or lemon juice
1 tsp. baking soda
1 tsp. sea salt
1 cup ground rice flour
1 1/2 cups graham flour 
1/3 cup cocoa powder*
1/3 cup dark chocolate chips*

*100% cocoa has several health benefits.   According to livestrong.com, it has 2-3 times the antioxidants found in green tea, and it can reduce blood pressure.  It can also lower LDL cholesterol levels and raise HDL cholesterol levels.  Plus, it tastes great.  Wow!

*I have to admit, this is an area where I cheat a little bit.  I just can't find dark chocolate chips that don't contain at least a little bit of refined sugar.  Whenever I buy chocolate chips, my goal is to find the brand with the highest cocoa content and the lowest sugar content.  It's not ideal, so I also limit the amount I'll use in any one recipe.

1.  Move oven rack to low, positioned so the top of the loaf pan will be in the center of the oven.  Preheat oven to 350 degrees.  Grease a 9" x 5" x 3" loaf pan and set aside.

2.  Mix milk and vinegar/lemon juice, set aside.  An alternative is to use 1 cup of buttermilk, but I never have it on hand so I just curdle some milk this way.

3.  Mix agave and butter.  Stir in eggs and blend.

4.  Stir in banana, milk, and vanilla.  Beat until combined.

5.  Add flour, cocoa, baking soda, and salt.  Stir until moist.  Fold in chocolate chips.

6.  Pour into loaf pan and bake for 1 hour 15 minutes, or until a knife inserted in the center of the loaf comes out clean.

7.  Set on cooling rack until pan is cool enough to touch.  Use a knife to loosen the loaf and remove it from the pan.  

8.  Cool until slightly warm, then slice and serve.


Gather ingredients.

Mix agave and butter.  Stir in eggs and blend.

Stir in banana, milk, and vanilla.  Beat until combined.
 Add flour, cocoa, baking soda, and salt.  Stir until moist.  Fold in chocolate chips.

Pour into loaf pan and bake for 1 hour 15 minutes,
or until a knife inserted in the center of the loaf comes out clean.

One thing I love about this recipe is the easy clean up.  Look how empty my tiny sink is!

Set on cooling rack until pan is cool enough to touch.
Use a knife to loosen the loaf and remove it from the pan.

Cool until slightly warm, then slice and serve.

Yum!


Wednesday, November 7, 2012

Chocolate Avocado Pudding

Yes, you read that right... chocolate AVOCADO pudding!  I first learned about this through cooking classes at a local restaurant, and I was too intrigued not to try it.  Here in the Milwaukee area, we are lucky enough to have a great organic restaurant called Cafe Manna.  It is, by far, my favorite restaurant in the world.  They use local, organic, vegetarian ingredients to create unique and flavorful dishes that change on a seasonal basis.  An added bonus is that they are willing to accommodate ANY diet.  I'm not kidding.  I went there once with a friend who has uncountable allergies: she's dairy free, gluten free, and nut free.  Cafe Manna was able to feed her.  Off the menu.  Wow!  At any rate, I was very excited when they began to offer cooking classes, and the first class I signed up for included a recipe for Chocolate Avocado Pudding.  I've since found many similar recipes online, but the recipe I'm going to share today is very close to the original Cafe Manna pudding that I first tasted over a year ago.  So, without further ado, here is the recipe that sounds so strange, but tastes so good. C'mon... you know you want to try it!

CHOCOLATE AVOCADO PUDDING

Ingredients:
1 ripe avocado*
1/2 cup light agave nectar
3 Tbsp. 100% cocoa powder
3 tsp. natural Mexican vanilla
1/4 tsp. salt
Sprinkle of unsweetened shredded coconut

*Avocados are soooo good for you!  See here for a list of amazing health benefits!

1.  Cut avocado in half.  Use a spoon to scoop out the "meat."

2.  Be sure to get every last bit!

3.  Add all ingredients to food processor.  Process until smooth.

4.  Top with coconut and ENJOY!

Gather Ingredients
Cut avocado in half.  Use a spoon to scoop out the "meat."

Be sure to get every last bit!


Add all ingredients to food processor.  It's funny how good this stuff is, but how bad it looks when the ingredients are just sitting there, waiting to be mixed.

Process until smooth.

Top with shredded coconut and ENJOY!