Tuesday, April 30, 2013

Ice Cream Substitute #2: Banana Soft Serve

 The first time I made this recipe, I was absolutely amazed.  I couldn't believe that it was possible to make a soft-serve consistency "ice cream" using little more than frozen banana chunks.  I don't remember the exact measurements of the original recipe I tried, or even where I found it.  Over time, I've made tiny adjustments and I ended up with this, which I think is quite good!


BANANA SOFT SERVE

Ingredients:
1 banana, cut into chunks and frozen overnight
Splash of pure vanilla
A splash or two of milk (any type, dairy or non-dairy)

1.  Place ingredients in food processor.  Unfortunately, this really doesn't work in a regular blender.  You need the powerful blades of the food processor to break up the frozen banana.

2.   Cover and pulse to blend, pausing to add an additional splash of milk if needed.

3.  Serve topped with homemade natural chocolate sauce.  (Note:  any natural sweetener can be used in place of the organic cane sugar in this chocolate sauce recipe.)

Place ingredients in food processor.  Cover and pulse to blend.

Continue pulsing, adding milk if needed, until a soft serve like consistency is achieved.

Top with homemade chocolate sauce and ENJOY!

Wednesday, April 24, 2013

The Best Way to Get Fresh Herbs and Vegetables...


...is to grow them yourself!  Andy and I love to garden, so we always have a decent amount of produce growing in our backyard.  This year, I'm once again getting back to the basics:  seeds!  I haven't grown my plants from seed in a loooong time, mainly because it's just easier to buy the pre-sprouted little plants at the garden center.  Things are different right now because I'm staying home with Baby C and we're trying to economize.  At this point, saving money is worth a little extra time.  Pre-sprouted little plants cost a heck of a lot more than a few packets of seeds, and it really doesn't take much time/effort to grow plants from seeds.   Plus, it's fun to watch them grow!  The method I describe below might not follow all the traditional rules of gardening, but it's what has worked for me in the past.  Please feel free to deviate a little, or even completely, from what I've done.

GROWING PLANTS FROM SEED

"Ingredients"

Seeds
Seed Starter Soil Mix
Small pots
Trays to set pots in
Plastic wrap
Squirt bottle/mister

1.  Place small pots into trays to contain water drainage and stray soil.  I used cookie sheets lined with wax paper, but I wouldn't recommend this unless you have some spare cookie sheets to use for cookies while your seeds germinate.  :)

2.  Fill each small pot with seed starter mix up to 1/4 inch from the top.  Some people have success with regular potting soil, but I prefer the seed starter.

3.  SOAK the seed starter until it will hold no more water.  I filled each pot up to the top with water, then let it drain out the bottom.

4.  Read your seed packets to find out how many seeds you should place in each pot, and whether you should scatter them or place them carefully.  Place seeds on starter mix.

5.  Sprinkle some dry starter mix on top of the seeds.  Again, read your seed packets to figure out how much you'll need in order to plant your seeds at the proper depth.

6.  Use a squirt bottle to mist the starter mix until moist.

7.  Place plastic wrap over pots to retain moisture.  I also like to label each tray with a "map" to remind me what I planted where.

8.  Place pots in the sunniest location in your house.  In our house, this location is on the bed in the guest room.  I protected the bed with a cheap Dollar Store table cloth, and I protected the entire setup from our cat with a baby gate.

9.  Check the seeds daily, and mist when needed.  You will begin to notice condensation (fog) on the plastic wrap.  That's a good thing!  It means that you've created a little greenhouse.  Depending on the types of seeds you plant, you could see sprouts in as little as 3 days!  They should be ready to transplant to your garden in 4-6 weeks.


Place small pots into trays to contain water drainage and stray soil.
I used cookie sheets lined with wax paper, but I wouldn't recommend this unless you have some spare cookie sheets to use while your seeds germinate.  :)

Fill each small pot with seed starter mix up to 1/4 inch from the top.
Some people have success with regular potting soil, but I prefer the seed starter.

SOAK the seed starter until it will hold no more water.
I filled each pot up to the top with water, then let it drain out the bottom.

Read your seed packets to find out how many seeds you should place in each pot, and whether you should scatter them or place them carefully.  P.S.  Look for sales when purchasing your seeds.
These did NOT cost $6.79.  We nabbed them for 50% off!

Place seeds on starter mix.

Sprinkle some dry starter mix on top of the seeds.  Again, read your seed packets to figure out how much you'll need in order to plant your seeds at the proper depth.  Use a squirt bottle to mist the starter mix until moist.

Place plastic wrap over pots to retain moisture.  I also like to label each tray with a "map" to remind me what I planted where.  

Place pots in the sunniest location in your house.  In our house, this location is the bed in the guest room.
I protected the bed with a cheap Dollar Store tablecloth,
and I protected the entire setup from our cat with a baby gate.

Check the seeds daily, and mist when needed.  Note the condensation (fog) on the plastic wrap in this picture.  That's a good thing!  It means that I've created a little greenhouse.
Depending on the types of seeds you plant, you could see sprouts in as little as 3 days!

Wednesday, April 10, 2013

Fresh & Tasty Guacamole and Pico de Gallo


Guacamole and pico de gallo... what a combination! I love to make these two recipes at the same time since they taste so darn good together.  Plus, I actually save time/effort, since most of the guac ingredients are contained in the pico.  Aside from some chopping, this is a super quick and easy set of recipes that pays back in a big way once you start eating!


FRESH & TASTY GUACAMOLE AND PICO DE GALLO

Ingredients:

2 ripe avocados
2 ripe roma tomatoes
1/2 medium sized red onion
1 large handful fresh cilantro
1 clove garlic
1/4 jalapeno (optional)
1 lime, juiced
1/2 cap full white vinegar
salt and pepper to taste

1.  Cut avocados in half.  Using a spoon, scoop the "meat" out of the peel.  Be sure to get every last bit of it!

2.  Save the pit for later.

3.  Using a fork, mash the avocado to desired consistency.  I like to leave it a bit lumpy, so there are some chunks of avocado in the guacamole.  Set aside.

4.  Chop tomatoes, onion, and cilantro.  Finely dice garlic and jalapeno.

5.  Mix all chopped and diced ingredients in a bowl.  Squeeze lime juice on top and mix again. This is your pico de gallo!

6.  Add 1/4 cup + 2 Tbsp. of the pico de gallo to the mashed avocado.  Mix well.  Add 1/2 cap full white vinegar, and stir.

7.  Add salt and pepper, to taste.  As always, I love a ton of salt! :)

8.  You should have a significant portion of pico de gallo, along with a nice bowl of guacamole.  Enjoy them as dips, add-ons to baked potato or eggs, or inside a burrito or burrito bowl.

9.  If you have leftovers, the pico de gallo can be stored in a sealed container in the fridge.  The guacamole can be stored the same way, but be sure to place the avocado pit in the center of your dip to prevent browning (See?  I told you to save it!)


Gather Ingredients
1.  Cut avocado in half.  Use a spoon to scoop out the "meat."
Be sure to get all of it!

2.  Save pit for later.

3.  Using a fork, mash avocado to desired consistency.
4.  Chop tomatoes, onion, and cilantro.  Finely dice jalapenos and garlic.

5.  Add all chopped and diced ingredients to a bowl.  Mix.  Squeeze lime juice on top, stir. Pico de Gallo is finished!  To make guacamole, add 1/4 cup + 2 Tbsp. of pico to the mashed avocado.  Add vinegar and stir.  

Two delicious treats!  Add them to baked potato, egg, or burritos, or just use as dips.


Tonight for dinner, we're having burritos stuffed with rice, corn, black beans, farmer's cheese, PICO DE GALLO, and GUACAMOLE!   ( P.S.  Meat Eaters, my husband will add some seasoned chicken or pork to his burritos...)


Wednesday, April 3, 2013

Two Ingredient Cookies

Yes... you read it correctly... I'm going to teach you how to make cookies with just TWO ingredients!  When I first read this idea on The Burlap Bag blog, I thought it sounded too good to be true.  Yet, here it is: a healthy, whole foods recipe for cookies that uses only two ingredients.  Of course, I've included some optional add-ins, but you really can make the cookies with just two ingredients. (P.S.  I like to go a little crazy with the add-ins!)


TWO INGREDIENT COOKIES

Ingredients:

2 ripe bananas
1 cup oatmeal
THAT'S IT!!!

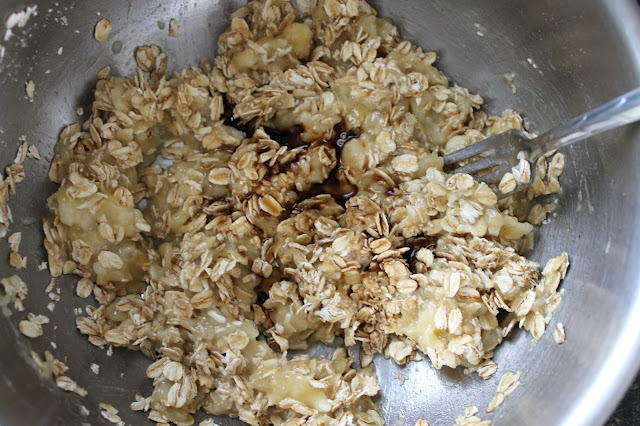
1.  Place bananas and oats in a mixing bowl.  Using a fork, mash the bananas until well blended.  Depending on the size/ripeness of your bananas, you might need to add more oats.

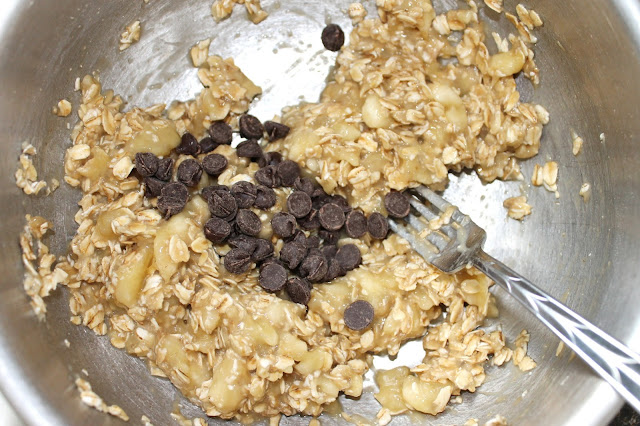
1a.  Mix in optional add-ins.  For the recipe shown here, I added a handful of dark chocolate chips, 1 tsp. vanilla, and a healthy squirt of honey.
I've also tried:

  • cinnamon - agave - chocolate chips
  • walnuts - honey - raisins
  • unsweetened coconut - 100% maple syrup - chocolate chips
  • cocoa powder - unsweetened coconut - agave
  • peanut butter
The key to add-ins is to be a bit conservative in how much you use.  Too many extras will cause the cookies to fall apart.  Also, don't worry about measuring; just let your imagination (and your taste buds) go wild!


2.  Spoon the mixture onto a very, veeerrrry well-greased cookie sheet.  The cookies should practically be ice skating (oil skating?) on the surface.  I found it easiest to lay down a sheet of aluminum foil so I could peel the cookies off easily after they're done baking.  NOTE:  Unlike flour-based cookies, these will not settle or change shape while baking.  Be sure to form them exactly as you would like them to look when done baking.

3.  Bake at 350 degrees for 15 minutes or so.

4.  ENJOY!
Place bananas and oats in a mixing bowl.

Using a fork, mash the bananas until well blended.
Depending on the size/ripeness of your bananas, you might need to add more oats.

Add-in #1:  1 tsp. vanilla.

Add-in #2:  handful of dark chocolate chips.

Add-in #3: generous squirt of honey.


Spoon the mixture onto a very, veeerrrry well-greased cookie sheet.
The cookies should practically be ice skating (oil skating?) on the surface.  I found it easiest to lay down a sheet of aluminum foil so I could peel the cookies off easily after they're done baking.
NOTE:  Unlike flour-based cookies, these will not settle or change shape while baking.
Be sure to form them exactly as you would like them to look when done baking.

Bake for 15 minutes at 350 degrees.  Remove, cool, enjoy!

YUM!  Healthy and delicious!